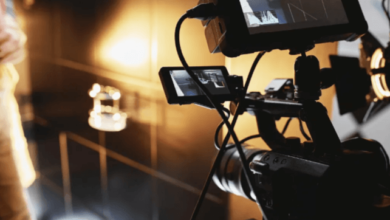
Capturing an event on video is both an art and a science. Whether you’re filming a wedding, a corporate event, or a live performance, the goal is to preserve the essence of the occasion in a way that is both visually stunning and emotionally impactful. With the right approach, your video can tell a story that resonates long after the event has ended. This article will provide you with top videography tips to help you capture your event like a pro, ensuring every moment is beautifully documented.
Understanding the Event’s Purpose and Audience
Before you even pick up your camera, it’s crucial to understand the purpose of the event and the expectations of your audience. Are you capturing a wedding, a corporate seminar, or a charity gala? Each event has its own unique atmosphere and purpose, which should guide your approach to videography.
For example, a wedding video should focus on emotion, intimacy, and personal connections, while a corporate event might require a more formal and structured approach, emphasizing key speakers and presentations. Knowing the audience will help you tailor your filming style, shot selection, and editing techniques to meet their expectations.

Planning and Pre-Production Essentials
Effective event videography begins long before the day of the event. Planning and pre-production are key to ensuring that everything goes smoothly. Start by visiting the venue ahead of time. This will give you a sense of the lighting, layout, and potential challenges you might face.
Create a shot list based on the event schedule. This list should include all the must-have shots, such as the entrance of the bride and groom at a wedding, the keynote speech at a conference, or the award ceremony at a gala. Having a shot list helps you stay organized and ensures you don’t miss any important moments.
It’s also important to communicate with the event organizers and other vendors. Understanding the flow of the event, key moments, and any specific requests will help you be in the right place at the right time. Coordination with photographers, sound technicians, and event planners can also ensure that your video and their work complement each other.
Choosing the Right Equipment
The equipment you use plays a significant role in the quality of your video. Here are some key pieces of gear you’ll need for successful event videography:
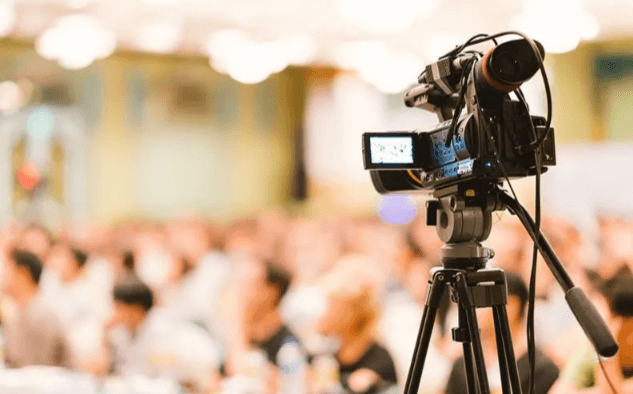
Cameras: A high-definition camera is essential. If possible, use multiple cameras to capture different angles and perspectives. DSLRs and mirrorless cameras are popular choices for their versatility and image quality.
Lenses: Having a range of lenses allows you to capture wide shots of the venue as well as close-ups of key moments. A 24-70mm zoom lens is a good all-around choice, while a 50mm prime lens is great for portraits and low-light situations.
Tripods and Stabilizers: To avoid shaky footage, use tripods or stabilizers. Gimbals are particularly useful for moving shots, while monopods offer stability with more flexibility than a tripod.
Lighting: Good lighting is crucial for capturing clear, vibrant footage. Portable LED lights can help in low-light situations, such as evening receptions or dimly lit conference rooms.
Microphones: High-quality audio is just as important as video. Use lapel mics for speakers, shotgun mics for capturing directional sound, and portable audio recorders for backup.
Batteries and Memory Cards: Always carry extra batteries and memory cards. Events can be unpredictable, and running out of power or storage can mean missing key moments.
Mastering Camera Settings and Techniques
Understanding your camera settings is essential to capturing high-quality video. Here are some tips to help you get the most out of your camera:
Frame Rate: For most events, a frame rate of 24 or 30 frames per second (fps) is ideal, giving your video a cinematic look. For slow-motion effects, consider shooting at 60 fps or higher.
Resolution: Shoot in the highest resolution your camera allows, ideally 4K. This gives you more flexibility in video editing and ensures your video looks sharp on larger screens.
Aperture: Use a wide aperture (f/2.8 or lower) for shallow depth of field, which is great for focusing on a subject while blurring the background. A narrower aperture (f/5.6 or higher) is better for group shots where you want everything in focus.
Shutter Speed: Set your shutter speed to double your frame rate (e.g., 1/50 for 24 fps) to achieve natural motion. Adjust as needed for low light or fast action.
White Balance: Ensure your white balance matches the lighting conditions to avoid color casts. Most cameras have preset white balance options for different lighting situations, or you can set it manually.
ISO: Keep your ISO as low as possible to reduce noise in your footage. Increase ISO only when necessary, such as in low-light conditions where additional lighting isn’t an option.
Capturing Key Moments
Every event has key moments that are essential to its narrative. To ensure you capture these moments effectively, follow these tips:
Anticipate the Action: Stay aware of what’s happening around you and anticipate key moments. For example, at a wedding, be ready for the first kiss, the exchange of vows, and the first dance. In a corporate event, focus on keynote speeches, audience reactions, and important presentations.
Use Multiple Angles: If possible, use multiple cameras or reposition your camera during the event to capture different angles. This gives you more options in editing and helps create a dynamic video.
Capture B-Roll Footage: B-roll footage, such as shots of the venue, decorations, and candid moments, adds depth to your video. This footage can be used to cover cuts or transitions in the main video, making the final product more polished and professional.
Focus on Details: Don’t just capture the big moments—small details are just as important. Close-ups of hands exchanging rings, a speaker’s gestures, or the audience’s reactions can add emotional impact to your video.
Stay Discreet: While it’s important to get close to the action, try to stay as discreet as possible. Use zoom lenses to capture moments from a distance without being intrusive.
Managing Lighting Challenges
Lighting can be one of the biggest challenges in event videography, especially in venues with low light or mixed lighting sources. Here are some strategies to manage lighting effectively:
Use Natural Light: When possible, take advantage of natural light, especially during outdoor events. Position your subjects so that the light illuminates their faces, avoiding harsh shadows.
Supplement with Artificial Lighting: In dimly lit venues, use portable LED lights to supplement available light. Soft, diffused lighting is ideal for reducing harsh shadows and creating a natural look.
Adjust Your Camera Settings: Increase your ISO or use a wider aperture in low light situations, but be mindful of potential noise and loss of sharpness. Use your camera’s histogram to ensure your exposure is correct and avoid overexposure or underexposure.
White Balance Adjustment: Mixed lighting (such as tungsten and fluorescent) can cause color balance issues. Adjust your white balance manually to ensure colors are accurate and consistent.
Bounce Light: When using on-camera lights, consider bouncing the light off walls or ceilings to create a softer, more diffused effect. This is especially useful in small or indoor spaces where direct lighting might be too harsh.
Capturing High-Quality Audio
Good audio can make or break your event video. Even the best visuals will fall flat if the sound quality is poor. Here’s how to capture high-quality audio:
Use External Microphones: Built-in camera microphones are often not sufficient for professional audio quality. Use external microphones, such as lapel mics for speakers, shotgun mics for directional sound, or handheld mics for interviews.
Monitor Audio Levels: Always monitor your audio levels during recording to ensure they’re not too low (which can lead to noise) or too high (which can cause distortion). Use headphones to listen for any unwanted background noise or technical issues.
Position Microphones Strategically: Place microphones as close as possible to the sound source. For speeches, clip lapel mics onto the speaker’s clothing, and for general ambient sound, position a shotgun mic towards the action.
Use Backup Audio Recorders: To avoid missing important audio, use a backup recorder in addition to your main microphone setup. This can be a portable audio recorder placed in a central location or connected directly to the venue’s sound system.
Reduce Background Noise: Be aware of background noise, such as air conditioning, crowd chatter, or traffic. Position your microphones carefully and use directional mics to minimize unwanted sounds.
Shooting B-Roll and Candid Moments
B-roll and candid moments are essential for creating a well-rounded event video. These clips add context, atmosphere, and emotional depth to your main footage. Here’s how to capture them effectively:
Be Observant: Keep an eye out for moments that aren’t part of the main action but still tell the story of the event. This could be guests mingling, behind-the-scenes preparations, or detailed shots of the decor.
Shoot in Short Bursts: When capturing B-roll, shoot in short bursts of 5-10 seconds. This gives you plenty of options to choose from in post-production without overwhelming your timeline with long clips.
Capture the Venue: Get wide shots of the venue, both inside and out. These establish the setting and provide context for the event.
Focus on Emotions: Candid moments are all about capturing genuine emotions. Look for laughter, tears, and other emotional reactions that add depth to your video.
Vary Your Shots: Use a mix of wide, medium, and close-up shots to create visual variety. This keeps the video interesting and helps convey different aspects of the event.
Managing Time and Event Flow
Time management is crucial in event videography. Events often run on tight schedules, and you need to be ready to capture important moments as they happen. Here’s how to manage your time effectively:
Create a Timeline: Work with the event organizer to create a timeline of key moments. This helps you plan where you need to be and when, ensuring you don’t miss anything important.
Prioritize Your Shots: If time is limited, prioritize the most important shots. Focus on the key moments first, and then capture additional footage if time allows.
Stay Flexible: Events don’t always go according to plan, so be prepared to adapt. If a speaker runs long or an activity starts late, adjust your schedule accordingly.
Use Assistants: If possible, bring an assistant or second shooter to help cover different angles and moments. This is especially useful for large events where it’s impossible to be in two places at once.
Communicate with the Event Team: Stay in close communication with the event planner or coordinator. They can give you a heads-up on upcoming activities or changes in the schedule.
Effective Post-Production Editing
Editing is where your footage comes together to tell a cohesive story. Here are some tips for effective post-production editing:
Organize Your Footage: Start by organizing your footage into categories, such as main events, B-roll, and interviews. This makes it easier to find the clips you need during editing.
Create a Rough Cut: Begin with a rough cut, arranging the main events in chronological order. This gives you a framework to build on as you add B-roll, music, and other elements.
Use Transitions Wisely: Transitions can add flow to your video, but use them sparingly. Simple cuts or fades are usually more effective than flashy transitions, which can distract from the content.
Incorporate Music: Music sets the tone for your video. Choose tracks that match the mood of the event, whether it’s upbeat and celebratory or calm and reflective. Ensure the music is licensed and fits the pacing of your footage.
Color Grading: Use color grading to enhance the mood and consistency of your video. Adjust the brightness, contrast, and saturation to create a polished, professional look.
Sync Audio and Video: Make sure your audio and video are perfectly synced, especially for speeches or performances. Use audio markers, such as claps or spikes, to align your tracks accurately.
Review and Revise: Once your edit is complete, review the entire video to ensure it flows smoothly and meets your expectations. Make any necessary revisions before finalizing the project.
Delivering the Final Product
How you deliver the final product is just as important as how you shoot and edit it. Here are some tips for delivering a professional final video:
Choose the Right Format: Deliver the video in the format that best suits your client’s needs. Common formats include MP4 for online sharing or DVD/Blu-ray for physical copies.
Provide Multiple Versions: Consider providing different versions of the video, such as a full-length version and a shorter highlight reel. This gives your client more options for sharing and viewing.
Ensure Quality: Before delivering the final product, check it for any issues, such as audio syncing problems, glitches, or color inconsistencies. The final product should be polished and professional.
Include a Trailer: For larger projects, consider creating a short trailer or teaser that highlights the best moments of the event. This can be a great way to showcase your work and build anticipation for the full video.
Backup Your Files: Always keep a backup of the final project files in case the client requests additional copies or revisions in the future.
FAQs
What frame rate should I use for event videography? A frame rate of 24 or 30 fps is ideal for most events, giving your video a cinematic look. For slow-motion effects, consider shooting at 60 fps or higher.
How can I ensure good audio quality during an event? Use external microphones, such as lapel mics or shotgun mics, and monitor audio levels throughout the event. Position microphones close to the sound source to minimize background noise.
What should I do if the lighting is poor? Supplement with portable LED lights, adjust your camera’s ISO and aperture settings, and use white balance adjustments to compensate for mixed or low lighting conditions.
How important is B-roll footage in event videography? B-roll footage is essential for adding context, atmosphere, and visual interest to your video. It helps fill in gaps and provides smooth transitions between key moments.
Should I use a second camera for event videography? Using a second camera is highly recommended, as it allows you to capture different angles and provides backup footage in case of technical issues with the primary camera.
How long should the final event video be? The length of the final video depends on the event and the client’s preferences. Typically, highlight reels are 3-5 minutes, while full-length videos can range from 15 minutes to an hour or more.
Conclusion
Event videography is a challenging but rewarding field that requires careful planning, technical skill, and creative vision. By following these top videography tips, you can capture your event in a way that not only preserves the memory but also tells a compelling story. From understanding the event’s purpose to mastering camera techniques and editing, each step is crucial to creating a high-quality video that will be cherished for years to come.